System prerequisites for a kubeadm Kubernetes cluster: swap, kernel modules, sysctl, containerd, and repository setup.
“How hard can it be to set up a Kubernetes cluster?” - Famous last words before discovering kubeadm
pkgs.k8s.io
repository and signed keyring method. Always check the
official kubeadm docs
for the latest instructions.Overview
This part is boring but critical. You’re preparing the OS before installing Kubernetes. Skip a step and you’ll debug cryptic errors for an hour. Ask me how I know.
Part 1: prep all nodes (control plane and workers). Part 2: actually build the cluster.
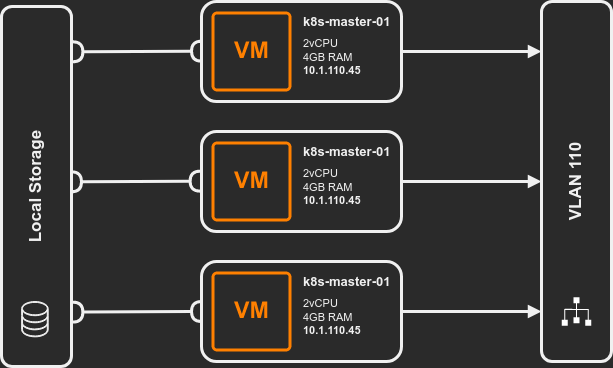
Lab setup: 3 Ubuntu VMs (2 vCPU, 4 GB RAM, 50 GB disk, static IPs). Adjust for your environment.

Disable Swap
“Kubernetes is opinionated about swap for the same reason surgeons are opinionated about sterile instruments.” - Resource Management 101
Kubernetes requires swap disabled. It needs precise resource accounting to schedule pods. Swap breaks that because the kernel can page out pod memory without Kubernetes knowing. Scheduler thinks a pod is using 1GB, it’s actually using 2GB on disk. Bad things happen.
Disable swap immediately:
sudo swapoff -a
Prevent swap from re-enabling on reboot by commenting it out of /etc/fstab:
sudo sed -e '/swap/ s/^#*/#/' -i /etc/fstab
Verify:
cat /etc/fstab
# /swap.img none swap sw 0 0
free -h. The Swap row should show
all zeros. If swap is still active after swapoff -a, check for zram devices:
cat /proc/swaps.Kernel Modules
Pod networking requires overlay and br_netfilter modules.
Persist across reboots:
cat <<EOF | sudo tee /etc/modules-load.d/k8s.conf
overlay
br_netfilter
EOF
Load them now:
sudo modprobe overlay
sudo modprobe br_netfilter
Verify:
lsmod | grep overlay && lsmod | grep br_netfilter
Sysctl Settings
Enable IP forwarding and bridge iptables processing:
sudo tee /etc/sysctl.d/kubernetes.conf<<EOF
net.bridge.bridge-nf-call-ip6tables = 1
net.bridge.bridge-nf-call-iptables = 1
net.ipv4.ip_forward = 1
EOF

sudo sysctl --system
Without these, pod-to-pod traffic across nodes gets dropped by the kernel.
Install Prerequisites
sudo apt-get update && sudo apt-get install -y \
    apt-transport-https \
    ca-certificates \
    curl \
    gnupg \
    lsb-release
Install Containerd
Kubernetes needs a container runtime. This guide uses containerd.
Add Docker’s GPG key and repository (containerd is distributed from Docker’s repo):
sudo install -m 0755 -d /etc/apt/keyrings
curl -fsSL https://download.docker.com/linux/ubuntu/gpg | sudo gpg --dearmor -o /etc/apt/keyrings/docker.gpg
sudo chmod a+r /etc/apt/keyrings/docker.gpg
echo \
  "deb [arch=$(dpkg --print-architecture) signed-by=/etc/apt/keyrings/docker.gpg] https://download.docker.com/linux/ubuntu \
  $(. /etc/os-release && echo "$VERSION_CODENAME") stable" | \
  sudo tee /etc/apt/sources.list.d/docker.list > /dev/null
Install:
sudo apt-get update && sudo apt-get install -y containerd.io
Configure Containerd
Generate the default config and enable SystemdCgroup. Kubernetes requires the systemd cgroup
driver for proper resource management.
sudo containerd config default | sudo tee /etc/containerd/config.toml
sudo sed -i 's/SystemdCgroup = false/SystemdCgroup = true/' /etc/containerd/config.toml
Verify:
grep SystemdCgroup /etc/containerd/config.toml
# SystemdCgroup = true
SystemdCgroup is still false after the sed command, edit the file manually. The
kubelet will fail to start if the cgroup driver doesn’t match.Restart containerd:
sudo systemctl restart containerd
Verify containerd is working before moving on. crictl talks directly to the container
runtime:
sudo crictl info | head -20
sudo crictl images
If crictl can’t connect, check sudo systemctl status containerd for errors. Catching a
broken runtime now saves time versus debugging a failed kubeadm init later.
Add the Kubernetes Repository
Download the signing key:
sudo mkdir -p /etc/apt/keyrings
curl -fsSL https://pkgs.k8s.io/core:/stable:/v1.32/deb/Release.key | sudo gpg --dearmor -o /etc/apt/keyrings/kubernetes-apt-keyring.gpg
v1.32 with the minor version you want. The pkgs.k8s.io repository is versioned
per minor release.Add the repository:
echo "deb [signed-by=/etc/apt/keyrings/kubernetes-apt-keyring.gpg] https://pkgs.k8s.io/core:/stable:/v1.32/deb/ /" | \
    sudo tee /etc/apt/sources.list.d/kubernetes.list
Verify:
cat /etc/apt/sources.list.d/kubernetes.list
Run All Steps on All Nodes
Every command in this article needs to run on every node in the cluster - control plane and workers alike. Part 2 covers the node-specific steps.